Shipping from Australia and New Zealand has always been awkward in Odoo. The built-in carrier connectors lean heavily toward North American and European providers — FedEx, UPS, DHL Express, Sendcloud. If your warehouse is in Sydney or Auckland and your customers are spread across the region, you were either writing custom integrations or managing carriers entirely outside your ERP.
That changes with the Starshipit connector. Starshipit is a shipping aggregation platform built specifically for the Australasian market. It connects to carriers like Australia Post, NZ Post, DHL Parcel, DPD, Aramex, CouriersPlease, StarTrack, and TNT — the carriers that actually move packages across Australia and New Zealand. Odoo now integrates with Starshipit natively, which means rate calculation, label generation, and tracking all happen inside the delivery order without leaving the ERP.
Getting the Starshipit Side Ready
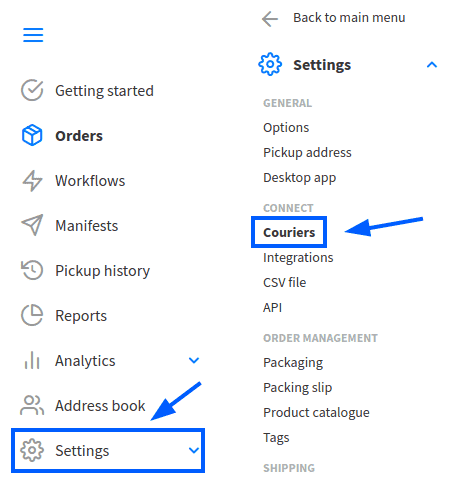
Before touching Odoo, the Starshipit account needs to be configured. The setup follows a logical sequence: define where packages ship from, connect the carriers you actually use, set up rate calculations, and create routing rules.
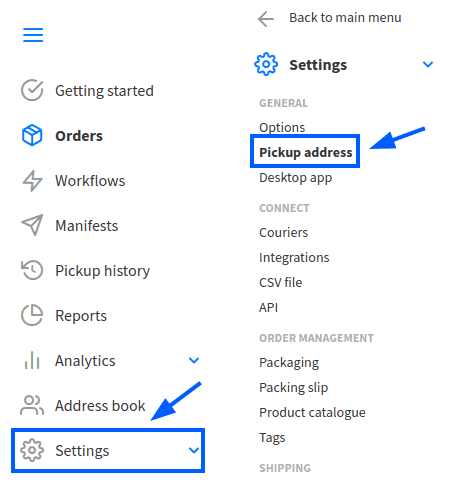
The pickup address configuration matters more than it might seem. This address drives rate calculations, determines which carrier services are available, and appears on shipping labels. It needs to match the warehouse address in Odoo exactly, or rate quotes will be wrong and labels will show the wrong origin.
Shipping Rules: The Underrated Feature
The most powerful part of the Starshipit setup is the rules engine. In the Starshipit dashboard under Settings, you can create rules that automatically route orders to specific carriers based on product codes, weight ranges, destination zones, or other conditions. The recommended configuration pattern uses a “Contains” condition matched against the product code, with the action set to assign a specific courier and product code.
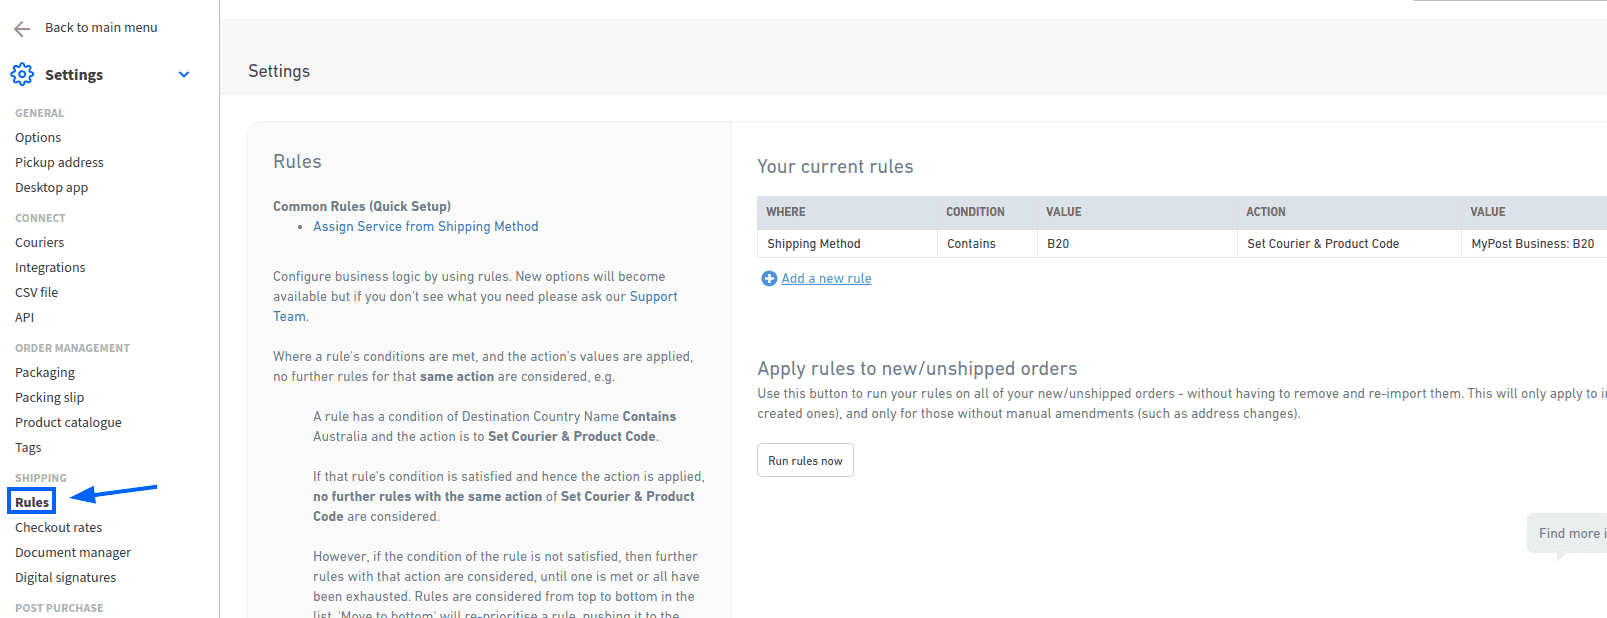
This means a single Starshipit delivery method in Odoo can intelligently route orders to different carriers based on what’s being shipped and where it’s going. A lightweight envelope to Melbourne goes via Australia Post. A heavy pallet to Perth routes through StarTrack. A time-sensitive package to Auckland gets picked up by DHL Express. The routing logic lives in Starshipit, so warehouse staff don’t need to manually select carriers for each shipment.
Connecting Odoo to Starshipit
On the Odoo side, the integration starts with installing the Starshipit Shipping module from the Apps store. Once installed, the Starshipit connector needs to be activated in the Inventory settings under Shipping Connectors. From there, you create a new delivery method with Starshipit as the provider.
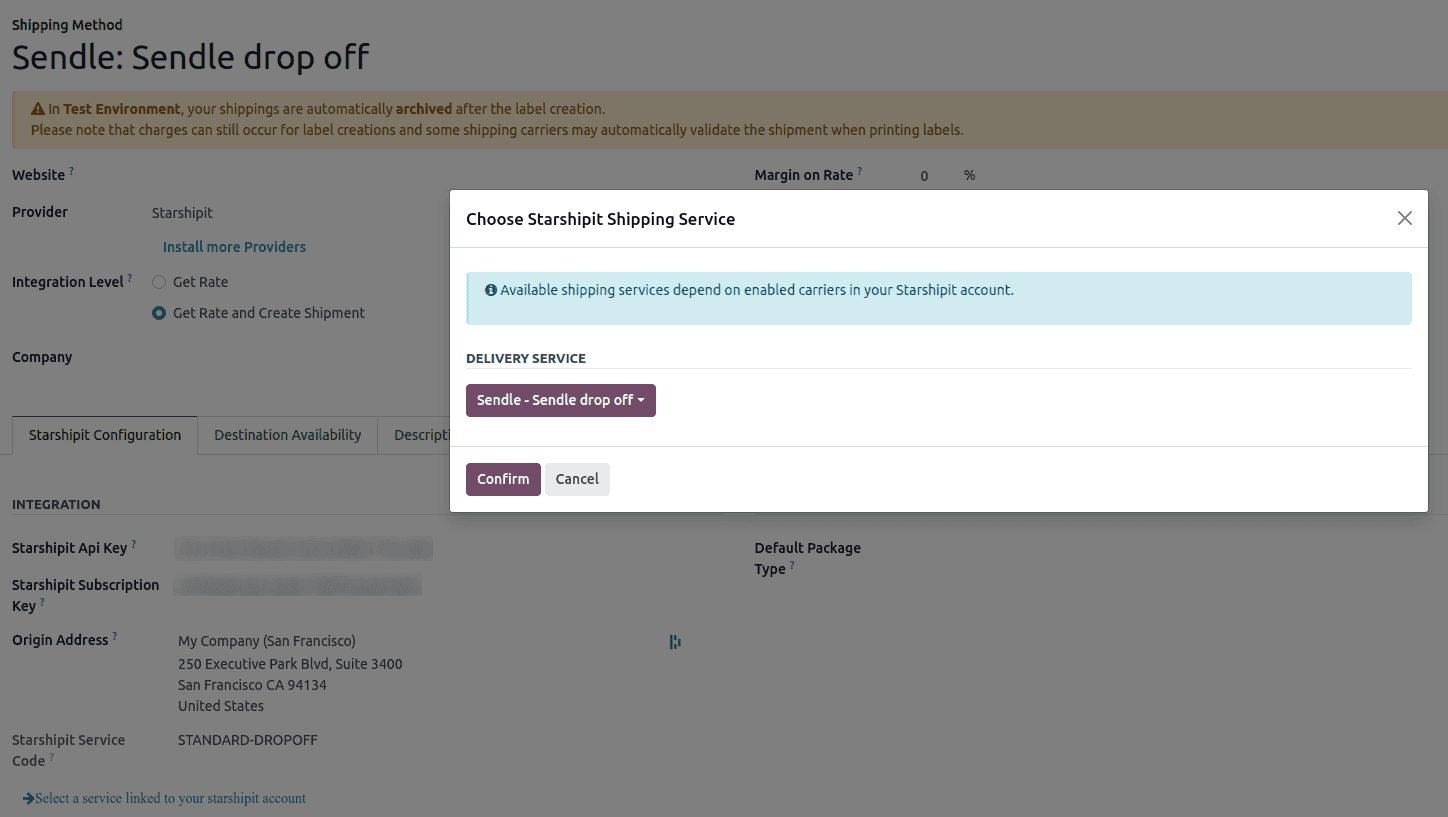
The configuration tab requires three things: the API key from Starshipit, the subscription key (both found under Settings → API in the Starshipit dashboard), and the origin address. The origin address is critical — it determines which rates Starshipit returns and which labels it generates. Setting the default package type here also unlocks automatic weight calculations based on product weights plus packaging weight.
Dynamic Service Discovery From the Sales Order
Here’s where the integration gets interesting. When you add shipping to a sales order, the initial service list might look incomplete. That’s because Starshipit pre-filters services based on a generic configuration. But a button labeled “Get more delivery methods” queries Starshipit’s API with the actual order details — destination address, package weight, dimensions — and returns every available service for that specific shipment.
This solves a real problem. A carrier might offer standard and express service to urban areas but only standard to regional zones. Instead of showing every possible service and letting the user pick one that turns out to be unavailable, Starshipit checks the actual delivery address and returns only valid options with real rates. Clicking “Get rate” on a specific service calculates the exact cost, and “Add” applies it to the order.
Labels, Tracking, and Returns
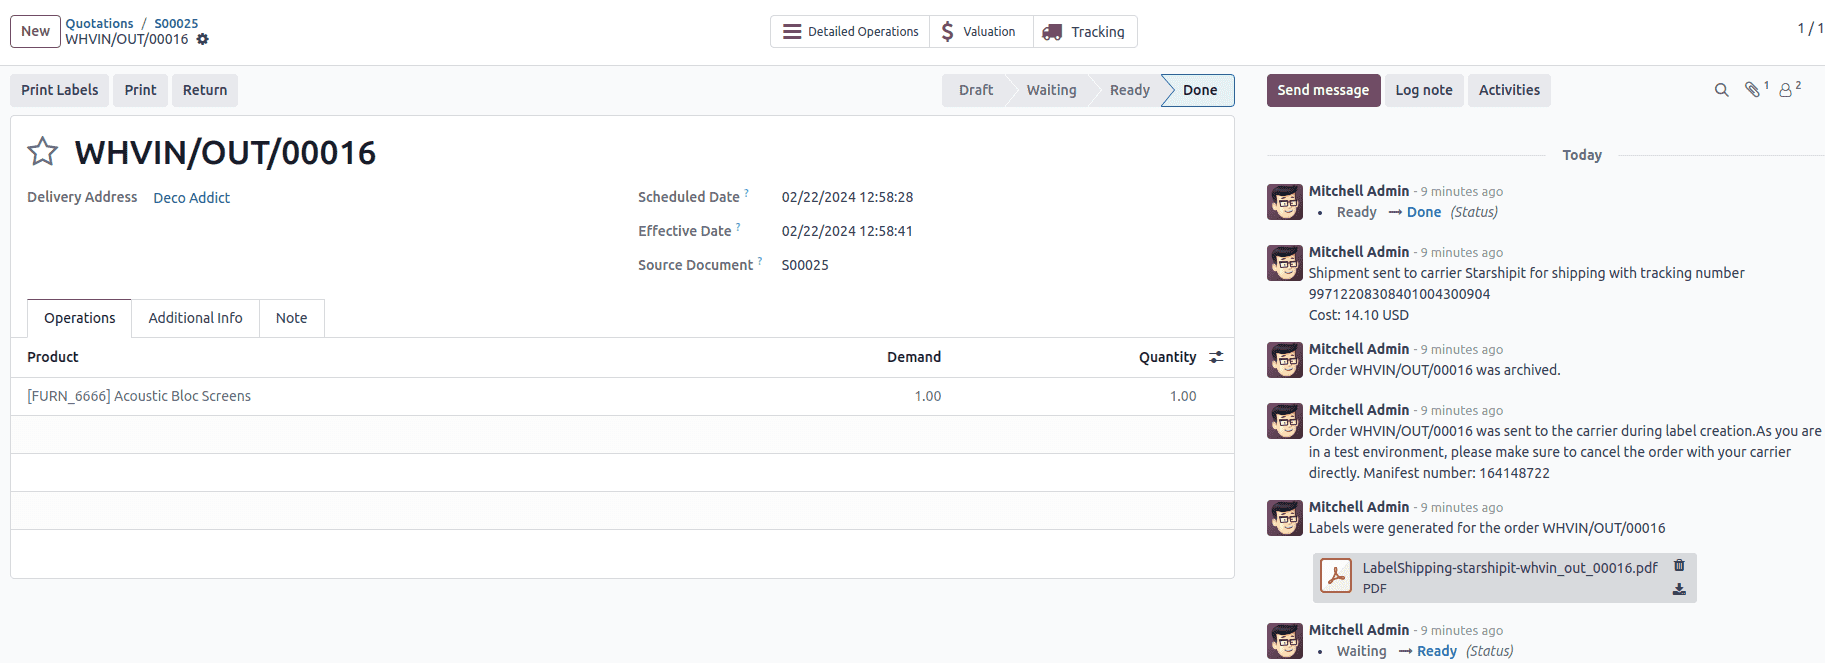
When a delivery order is validated, Starshipit automatically generates shipping labels. The number of labels matches the number of packages. If the courier supports tracking, tracking numbers are attached to the delivery order automatically. For carriers that support it — Australia Post eParcel, TNT, CouriersPlease, Aramex, StarTrack, DHL Express, and NZ Post Domestic — return labels can be printed directly from the delivery order using a Return smart button.
The test environment deserves a mention. Starshipit has a sandbox mode where labels are created and then immediately cancelled automatically. This lets warehouse teams validate the entire flow — rate calculation, label formatting, tracking number assignment — without creating real shipments or incurring charges.
One Caveat on Cancellations
Cancelling a delivery order in Odoo archives the shipment in Starshipit, but the cancellation is not forwarded to the courier itself. If a shipment has already been dispatched or manifested with the carrier, warehouse staff need to log into the courier’s platform to handle the cancellation manually. This is a gap worth knowing about before your team assumes cancelling in Odoo means the pickup is stopped.
Who This Is Actually For
Any Odoo deployment shipping domestically within Australia or New Zealand, or between the two countries, should evaluate this connector. The carriers Starshipit supports — Australia Post, NZ Post, StarTrack, Aramex, CouriersPlease, DPD, TNT, DHL Parcel — cover the vast majority of Australasian shipping volumes. For businesses that previously managed carrier relationships outside Odoo entirely, this brings rate shopping, label printing, and shipment tracking inside the same system where orders are created and inventory is managed. That consolidation alone is worth the integration effort.